개인 공부 후 자료를 남기기 위한 목적임으로 내용 상에 큰 문제가 있을 수도 있습니다.
라이브러리 추가 gradle(Modul:pp)에 다음과 같이 support design 라이브러리를 추가합니다.
25.0.0 버전 이상부터 BottomNavigationView 를 사용할 수 있게 되었습니다.
27.1.0 버전을 사용하겠습니다.
implementation 'com.android.support:design:27.1.0'
일단 먼저 BottomNavigationView에 사용할 메뉴를 먼저 정의합니다.
최소 3개에서 5개까지 Item을 추가해야 한다고 Guideline 에 정의되어 있습니다.
Guideline를 무시?하고 1개만 일단 정의해 보겠습니다.
1
2
3
4
5
6
7
8
9
10
11
<?xml version="1.0" encoding="utf-8" ?> <menu xmlns:android="http://schemas.android.com/apk/res/android" xmlns:app="http://schemas.android.com/apk/res-auto" > <item android:id="@+id/bottom_nav" android:enabled="true" android:icon="@drawable/ic_room_service_black_24dp" android:title="Dummy" app:showAsAction="always" /> </menu>
Layout resource file 자 이제 Layout을 아래와 같이 적용해 보겠습니다.
1
2
3
4
5
6
7
8
9
10
11
12
13
14
15
16
17
18
19
20
21
22
23
24
25
26
27
28
29
30
31
32
33
34
35
36
37
38
39
40
41
<?xml version="1.0" encoding="utf-8" ?> <android.support.design.widget.CoordinatorLayout xmlns:android="http://schemas.android.com/apk/res/android" xmlns:app="http://schemas.android.com/apk/res-auto" xmlns:tools="http://schemas.android.com/tools" android:id="@+id/rootLayout" android:layout_width="match_parent" android:layout_height="match_parent" tools:context=".MainActivity" > <android.support.design.widget.AppBarLayout android:layout_width="match_parent" android:layout_height="wrap_content" > <android.support.v7.widget.Toolbar android:id="@+id/toolbar" android:layout_width="match_parent" android:layout_height="wrap_content" android:theme="@style/ToolbarOverlay" app:layout_scrollFlags="scroll|enterAlways" app:titleTextColor="@android:color/white" /> </android.support.design.widget.AppBarLayout> <android.support.v7.widget.RecyclerView android:id="@+id/recycler" android:layout_width="match_parent" android:layout_height="match_parent" app:layoutManager="android.support.v7.widget.LinearLayoutManager" app:layout_behavior="@string/appbar_scrolling_view_behavior" /> <android.support.design.widget.BottomNavigationView android:id="@+id/bottomNav" android:layout_gravity="bottom" android:background="@android:color/white" app:layout_behavior=".Behavior.BottomNavigationViewBehavior" app:menu="@menu/menu_bottom_nav" android:layout_width="match_parent" android:layout_height="wrap_content" /> </android.support.design.widget.CoordinatorLayout>
Behavior 스크롤이 아래로 내려갈 경우 BottomNavigationView와 AppBar를 숨기고 다시 위로 스크롤이 올라갈 경우 노출하길 원한다면?
Behavior 을 정의하면 됩니다.
먼저 CoordinatorLayout.Behavior 를 extent 합니다.1 public class BottomNavigationViewBehavior extends CoordinatorLayout .Behavior
그리고 생성자 를 추가해야 한다. 그렇지 않으면 Could not inflate Behavior subclass Runtime Exception 에러가 생긴다.1 2 3 4 5 6 public BottomNavigationViewBehaviour () } public BottomNavigationViewBehaviour (Context context, AttributeSet attrs) super (context, attrs); }
onStartNestedScroll , onNestedScroll 를 Override 합니다.
1 2 3 4 5 6 7 8 9 10 11 12 13 14 15 16 17 18 @Override public boolean onStartNestedScroll (@NonNull CoordinatorLayout coordinatorLayout, @NonNull View child, @NonNull View directTargetChild, @NonNull View target, int axes, int type) return axes == ViewCompat.SCROLL_AXIS_VERTICAL; } @Override public void onNestedScroll (@NonNull CoordinatorLayout coordinatorLayout, @NonNull View child, @NonNull View target, int dxConsumed, int dyConsumed, int dxUnconsumed, int dyUnconsumed, int type) super .onNestedScroll(coordinatorLayout, child, target, dxConsumed, dyConsumed, dxUnconsumed, dyUnconsumed, type); child.setTranslationY(Math.max(0f , Math.min(Float.parseFloat(String.valueOf(child.getHeight())), child.getTranslationY() + dyConsumed))); }
위에서 작업한 menu 와 behavior 를 정의하겠습니다.
app:menu=”@menu/menu_bottom_nav” app:layout_behavior=”.Behavior.BottomNavigationViewBehavior”
1 2 3 4 5 6 7 8 <android.support.design.widget.BottomNavigationView android:id="@+id/bottomNav" android:layout_gravity="bottom" android:background="@android:color/white" app:layout_behavior=".Behavior.BottomNavigationViewBehavior" app:menu="@menu/menu_bottom_nav" android:layout_width="match_parent" android:layout_height="wrap_content" />
RecyclerView Adapter 자! 이제 RecyclerView 를 사용하여 Adapter 구현하겠습니다.
1 2 3 4 5 6 7 8 9 10 11 12 13 14 15 16 17 18 19 20 21 22 23 24 25 26 27 28 29 30 31 32 33 34 35 36 37 38 39 public class DummyAdapter extends RecyclerView .Adapter <DummyAdapter .ViewHolder > private Context context; private List<String> dummyList; public DummyAdapter (Context context, List<String> dummyList) this .context = context; this .dummyList = dummyList; } @NonNull @Override public ViewHolder onCreateViewHolder (@NonNull ViewGroup parent, int viewType) View view = LayoutInflater.from(parent.getContext()) .inflate(R.layout.item_row, parent, false ); return new ViewHolder(view); } @Override public void onBindViewHolder (@NonNull ViewHolder holder, int position) holder.txtName.setText(dummyList.get(position)); } @Override public int getItemCount () return dummyList.size(); } class ViewHolder extends RecyclerView .ViewHolder private TextView txtName; ViewHolder(View itemView) { super (itemView); txtName = (TextView) itemView.findViewById(R.id.txtName); } } }
Click event item.getItemId를 불러와 각 메뉴의 action을 정의하여 사용하시면 됩니다.
1 2 3 4 5 6 7 8 9 10 11 12 13 14 15 bottomNavigationView.setOnNavigationItemSelectedListener(new BottomNavigationView.OnNavigationItemSelectedListener() { @Override public boolean onNavigationItemSelected (@NonNull MenuItem item) switch (item.getItemId()) { case : R.id.action <-- 생략 --> break ; case : R.id.action <-- 생략 --> break ; } return true ; } }); }
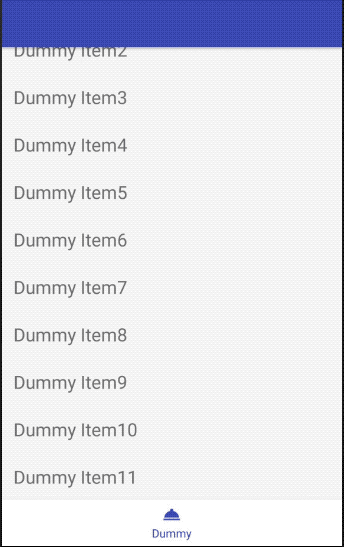
임의에 Data를 넣고 구현 아래와 같이 Dummy data를 넣고 구현한 Sample입니다.
1 2 3 4 5 6 7 8 9 10 11 12 13 14 15 private List<String> dummyList = new ArrayList<>();@Override protected void onCreate (Bundle savedInstanceState) <-- 생략 --> getDummyData(); } private void getDummyData () for (int i = 0 ; i < 50 ; i++) { dummyList.add(new StringBuilder("Dummy Item" ).append(i + 1 ).toString()); } DummyAdapter adapter = new DummyAdapter(this , dummyList); recyclerView.setAdapter(adapter); }