개인 공부 후 자료를 남기기 위한 목적임으로 내용 상에 큰 문제가 있을 수도 있습니다.
잘못된 내용이 있다면 언제든지 편하게 댓글 남겨주시면 감사하겠습니다.
프로젝트에 사용할 준비물
먼저 라이브러리를 Gradle에 다음과 같이 추가하고 적용한다.
1
2
3
4
5
6
7
8
9
10
11
|
implementation 'com.squareup.retrofit2:converter-gson:2.3.0'
implementation 'com.squareup.retrofit2:adapter-rxjava2:2.3.0'
implementation "io.reactivex.rxjava2:rxjava:2.1.7"
implementation "io.reactivex.rxjava2:rxandroid:2.0.1"
implementation 'com.android.support:cardview-v7:27.1.1'
implementation 'com.android.support:recyclerview-v7:27.1.1'
|
AndroidMenifest.xml에 Internt을 추가한다.
1
| <uses-permission android:name="android.permission.INTERNET"/>
|
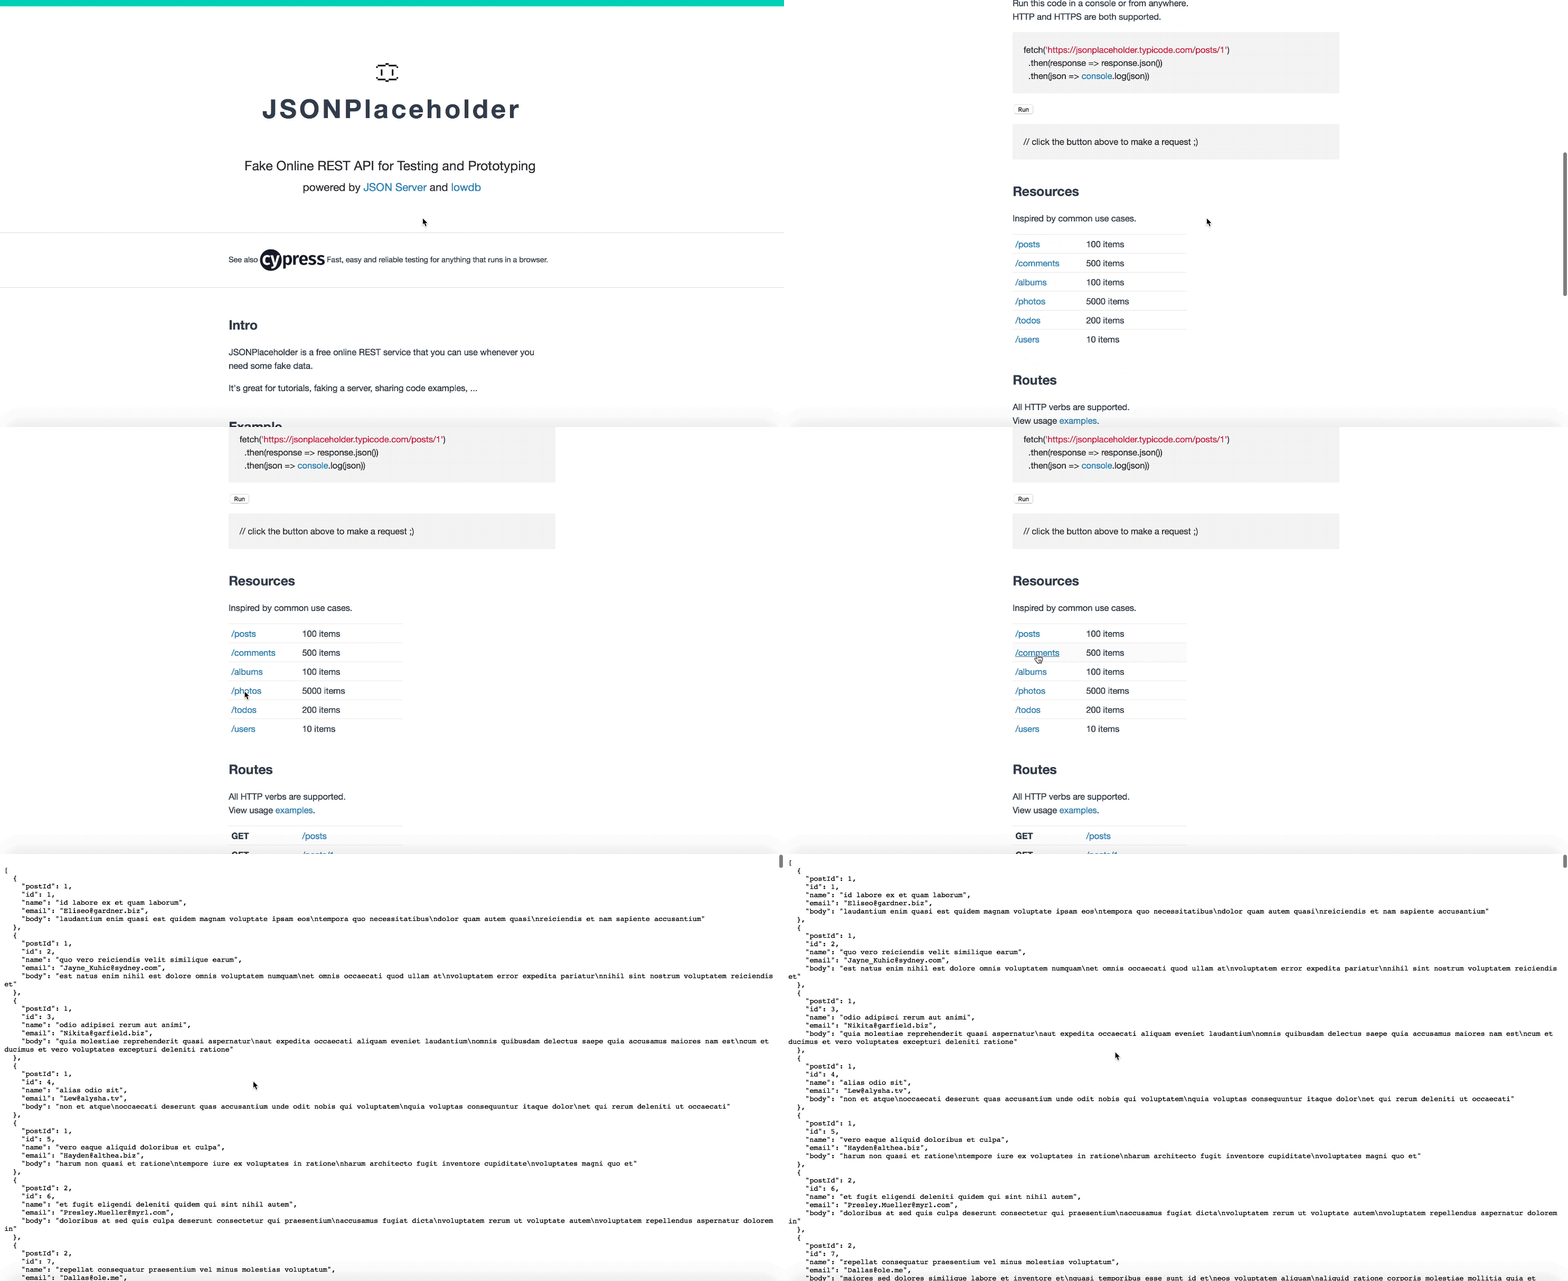
Fake Online REST API를 준비

Pojo Model
Json을 Pojo 모델로 변환 하자
1
2
3
4
5
6
7
8
9
10
11
12
13
14
15
16
17
18
19
20
21
22
23
24
25
26
27
28
29
30
31
32
33
34
35
36
37
38
| public class Comment {
private String name;
private String email;
private String body;
public Comment() {
}
public Comment(String name, String email, String body) {
this.name = name;
this.email = email;
this.body = body;
}
public String getName() {
return name;
}
public void setName(String name) {
this.name = name;
}
public String getEmail() {
return email;
}
public void setEmail(String email) {
this.email = email;
}
public String getBody() {
return body;
}
public void setBody(String body) {
this.body = body;
}
}
|
Retrofit2 with RxJava
- Retrofit은 interface를 정의하여 HTTP 통신을 할 준비를 한다.
- @Get Annotation을 추가한다.
1
2
3
4
5
|
public interface CommentAPI {
@GET("comments")
Observable<List<Comment>> getComments();
}
|
- 통신을 하기 위해서 Instance를 생성한다.
- Rxjava의 Observable을 통해서 어떤 클래스를 통해서 Response 받을 것인지 지정해준다.
- GsonConverter를 통해 Json으로 파싱 후 위에 지정한 Pojo 클래스의 멤버 변수에 대입한다.
1
2
3
4
5
6
7
8
9
10
11
12
13
14
15
16
17
18
|
public class RetrofitClient {
private static Retrofit retrofitInstance;
private RetrofitClient() {
}
public static Retrofit getInstance() {
if (retrofitInstance == null)
retrofitInstance = new Retrofit.Builder()
.baseUrl("http://jsonplaceholder.typicode.com/")
.addConverterFactory(GsonConverterFactory.create())
.addCallAdapterFactory(RxJava2CallAdapterFactory.create())
.build();
return retrofitInstance;
}
}
|
Layout resource file
자 이제 Layout을 아래와 같이 적용해 보자.
1
2
3
4
5
6
7
8
9
10
11
12
13
14
15
16
17
18
19
20
21
22
23
24
25
26
27
28
29
30
31
32
33
34
35
36
37
38
39
40
41
42
43
44
45
46
47
48
49
50
51
52
53
54
55
56
57
58
59
60
61
62
63
64
65
66
67
| ** activity_main.xml **
<?xml version="1.0" encoding="utf-8"?>
<RelativeLayout
xmlns:android="http://schemas.android.com/apk/res/android"
xmlns:tools="http://schemas.android.com/tools"
android:layout_width="match_parent"
android:layout_height="match_parent"
tools:context=".MainActivity">
<android.support.v7.widget.RecyclerView
android:id="@+id/recycler"
android:layout_width="wrap_content"
android:layout_height="wrap_content"/>
</RelativeLayout>
** row_item.xml **
<?xml version="1.0" encoding="utf-8"?>
<RelativeLayout
xmlns:android="http://schemas.android.com/apk/res/android"
xmlns:app="http://schemas.android.com/apk/res-auto"
android:layout_width="match_parent"
android:layout_height="wrap_content">
<android.support.v7.widget.CardView
android:layout_width="match_parent"
android:layout_height="wrap_content"
android:layout_margin="8dp"
android:background="@android:color/white"
app:cardCornerRadius="4dp"
app:cardElevation="8dp">
<LinearLayout
android:layout_width="match_parent"
android:layout_height="wrap_content"
android:layout_margin="8dp"
android:orientation="vertical">
<TextView
android:id="@+id/txt_name"
android:layout_width="wrap_content"
android:layout_height="wrap_content"
android:text=""
android:textSize="12sp"
android:textStyle="bold"/>
<TextView
android:id="@+id/txt_email"
android:layout_width="wrap_content"
android:layout_height="wrap_content"
android:text=""
android:textSize="12sp"
android:textStyle="normal"/>
<TextView
android:id="@+id/txt_body"
android:layout_width="wrap_content"
android:layout_height="wrap_content"
android:text=""
android:textSize="12sp"
android:textStyle="normal"/>
</LinearLayout>
</android.support.v7.widget.CardView>
</RelativeLayout>
|
RecyclerView Adapter 만들기
자! 이제 RecyclerView를 사용하여 Adapter 구현하자.
1
2
3
4
5
6
7
8
9
10
11
12
13
14
15
16
17
18
19
20
21
22
23
24
25
26
27
28
29
30
31
32
33
34
35
36
37
38
39
40
41
42
43
44
| ** ViewHolder **
public class CommentViewHolder extends RecyclerView.ViewHolder {
TextView txtName, txtEmail, txtBody;
public CommentViewHolder(View itemView) {
super(itemView);
txtName = (TextView) itemView.findViewById(R.id.txt_name);
txtEmail = (TextView) itemView.findViewById(R.id.txt_email);
txtBody = (TextView) itemView.findViewById(R.id.txt_body);
}
}
** Adapter **
public class CommentAdapter extends RecyclerView.Adapter<CommentViewHolder> {
private Context context;
private List<Comment> commentList;
public CommentAdapter(Context context, List<Comment> commentList) {
this.context = context;
this.commentList = commentList;
}
@NonNull
@Override
public CommentViewHolder onCreateViewHolder(@NonNull ViewGroup parent, int viewType) {
View view = LayoutInflater.from(parent.getContext())
.inflate(R.layout.row_item, parent, false);
return new CommentViewHolder(view);
}
@Override
public void onBindViewHolder(@NonNull CommentViewHolder holder, int position) {
holder.txtName.setText(String.valueOf(commentList.get(position).getName()));
holder.txtEmail.setText(String.valueOf(commentList.get(position).getEmail()));
holder.txtBody.setText(String.format("%s...", commentList.get(position).getBody()).substring(0, 25));
}
@Override
public int getItemCount() {
return commentList.size();
}
}
|
데이터를 응답 받아서 처리하기
- Scheduler 설정
- subscribeOn: Observable의 subscribe()가 실행되는 스레드를 바꿔줍니다.
- observeOn: subscribe 직전에 observeOn(AndroidSchedulers.mainThread())를 사용하여 onNext() 메서드가 UI Thread에서 실행되도록 구성되어 있다.
- 공식 문서
1
2
3
4
5
6
7
8
9
10
11
12
13
14
15
16
17
18
19
20
21
22
23
24
25
26
27
28
29
30
31
32
33
34
35
36
37
38
39
40
41
42
43
44
45
46
| private CommentAPI commentAPI;
private RecyclerView recyclerView;
private CompositeDisposable compositeDisposable = new CompositeDisposable();
@Override
protected void onCreate(Bundle savedInstanceState) {
super.onCreate(savedInstanceState);
setContentView(R.layout.activity_main);
Retrofit retrofit = RetrofitClient.getInstance();
commentAPI = retrofit.create(CommentAPI.class);
recyclerView = (RecyclerView) findViewById(R.id.recycler);
recyclerView.setHasFixedSize(true);
recyclerView.setLayoutManager(new LinearLayoutManager(this));
importingData();
}
private void importingData() {
compositeDisposable.add(commentAPI.getComments()
.subscribeOn(Schedulers.io())
.observeOn(AndroidSchedulers.mainThread())
.subscribe(new Consumer<List<Comment>>() {
@Override
public void accept(List<Comment> comments) throws Exception {
showData(comments);
}
}));
}
private void showData(List<Comment> comments) {
CommentAdapter adapter = new CommentAdapter(this, comments);
recyclerView.setAdapter(adapter);
}
@Override
protected void onStop() {
compositeDisposable.clear();
super.onStop();
}
}
|
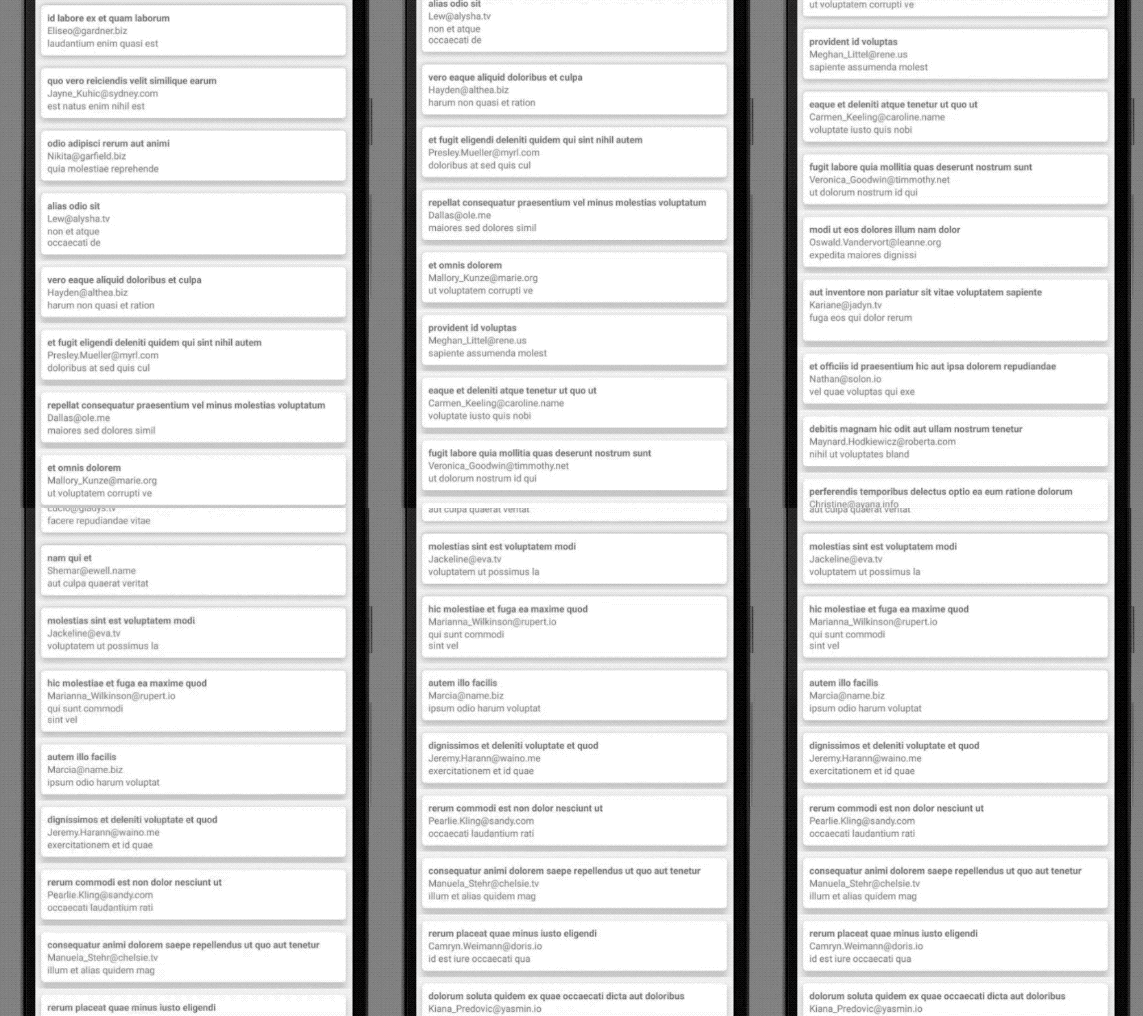
구현 화면


